First Lite Catalyst Soft Shell Jacket

| October 17, 2021
First Lite Catalyst Cypher
Photo Credit: Keith Knoxsville
A Hen and a Drake Green Teal on the truck bed. Not a limit on anything, but a fun morning out.
Color | Cipher Camouflage
Material | Face - 88% Polyester / 12% Spandex | Back - 100% Polyester
Type | Soft Shell Jacket
Layer | Outer Layer
Temp. Rating | 20F-45F(Active), 45F-60F
Features | Quiet Construction, 3D Turret Hood, Wind Blocking, Repels Snow/Rain
Pockets | 2 Breast Pockets, 2 Hand Pockets
Closures | YKK Full Zip
Fit | Athletic
Size | Small
Weight | 19 ounces
Country of Origin | Imported
Warranty | Manufacturer's Defect / Discretionary
Price | $240
Fit
4.2/5

Durability
4.4/5

Features
4.5/5

Flex
5/5

Price
4.5/5

Overall
4.5/5

The First Lite Catalyst Soft Shell Jacket is our first foray into First Lite’s product offerings. We were interested in testing a quiet and comfortable jacket, with good breathability, mobility, and protection from the elements common on high sierra hunts and eastern sierra waterfowling.

First Impressions

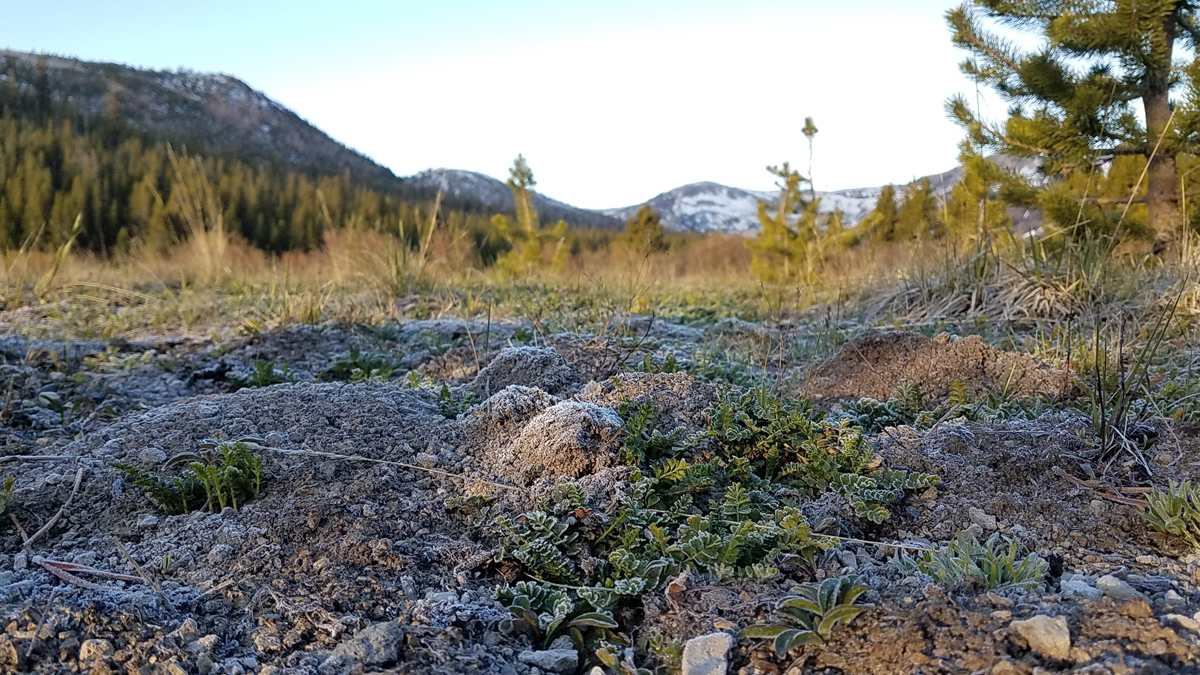
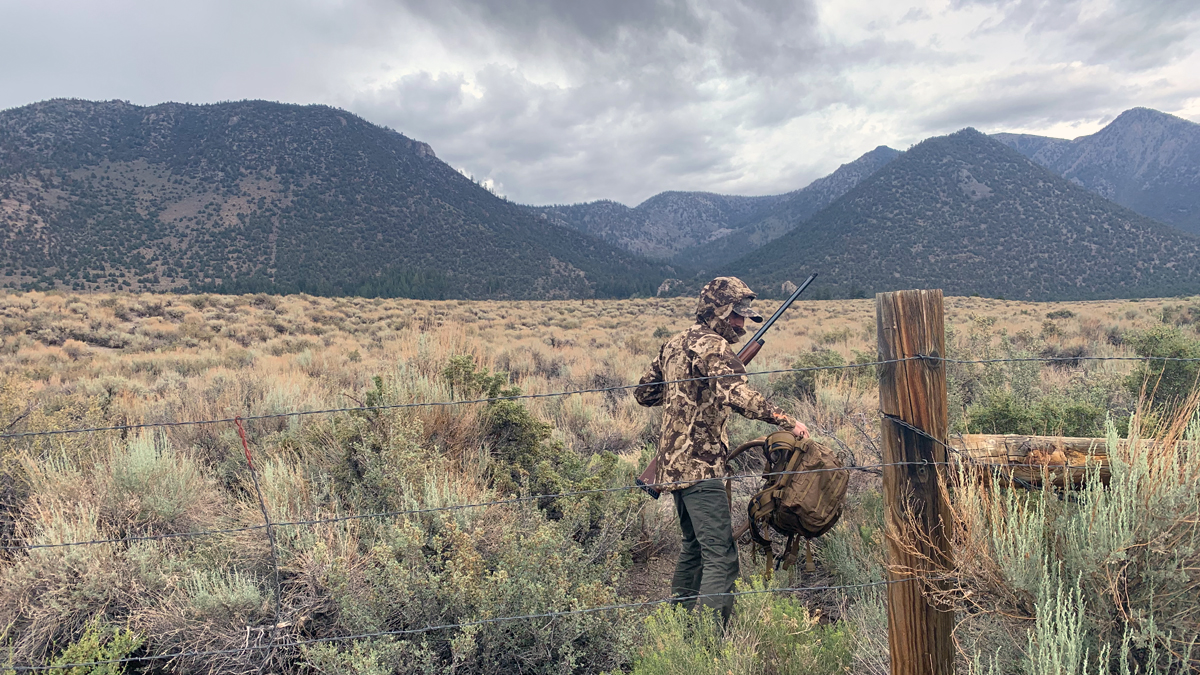
At first glance, it looks like the Catalyst is as awesome as you would hope from a $240 soft shell. The cipher camouflage pattern is a great match for alpine granite and tree line vegetation, as well as sage and juniper inclines, alpine meadows, and the sage covered foothills of the Eastern Sierra

Upon more scrutinous inspection, the construction looks to be all-around solid, and the materials, high quality. There are no frays on materials or stitching. Every seam looks tight, and even. Stitches at the zipper are concealed and all the stitching looks solid and tight everywhere on the jacket.

If you have any sewing knowledge, then you know that there is a wide range of stitching patterns, with different stitch lengths, widths, and purposes. Some are meant to stretch, others are meant to create clean tight seams, others keep fabrics from fraying at the edges, but many provide a combination of those strengths and uses. First Lite’s stitching choices for the soft shell are very appropriate for the locations and materials, and the stitching quality is very high.

First Lite Catalyst Quality Stitching

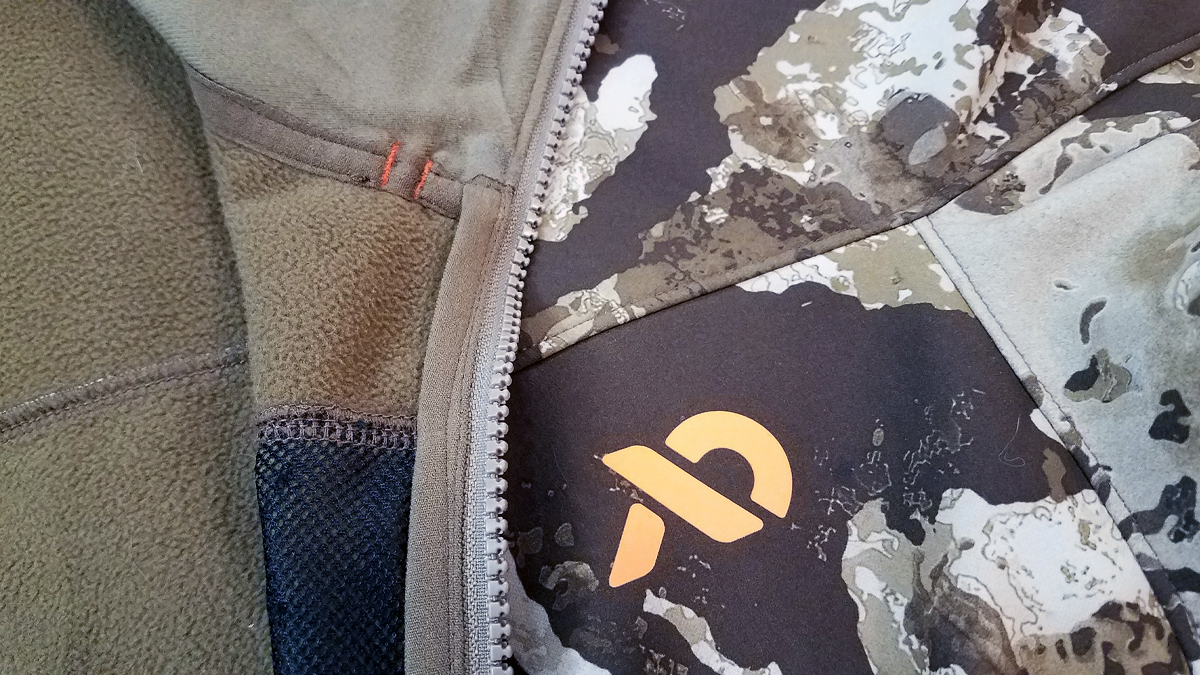
The First Lite Catalyst is really well made with a high level of detail to stitching, seams, quality control, and materials.

In The Field

The Catalyst Soft Shell has a full front zipper, making it easy to put on and take off. The zipper didn’t suffer from any binding or stickiness over more than 20 days of hunting and some days of casual wear.

Two chest pockets and both hand pockets have zippers. One chest pocket is flush, while the other use a small overlap to ensure a good seal from the environment. However, the pockets are mesh-lined, and while it may be a personal and subjective opinion, our only real criticism is that the pockets would be better if lined with a normal solid breathable fabric liner, instead of the mesh. The small size Catalyst jacket fits a slim but athletic 5’7″ build with a +4 ape index very well. The sleeve length is long enough that it does not creep up the arms past the wrist while drawing a bow to a full draw.

Although the fit is very good in general, with arms fully extended overhead the jacket rises high enough on the torso to desire just a tiny bit more torso length. Lifting arms overhead, shouldering a rifle, and even drawing a bow, is easy, and just like First Lite claims, it’s very quiet. First Lite hunting apparel is definitely in an elite tier of camouflage and hunting apparel, and an obvious upgrade over low to mid-tier camouflage and performance brands, like Cabela’s RedHead or Underarmor’s limited camouflage offerings.

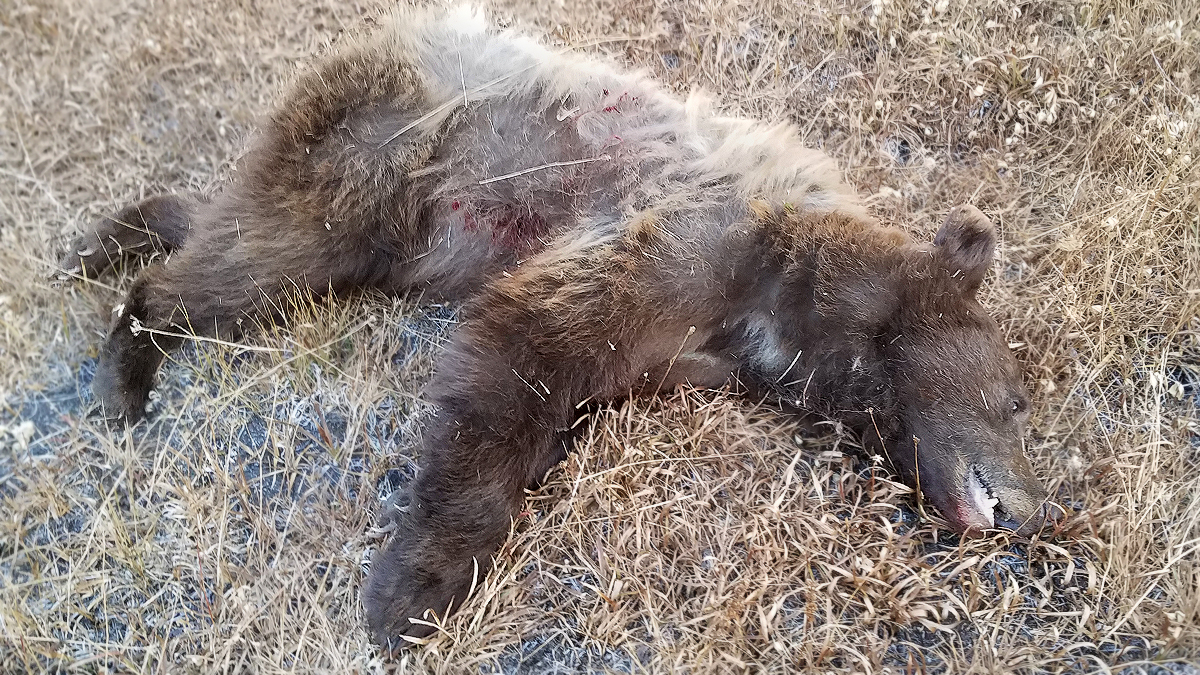
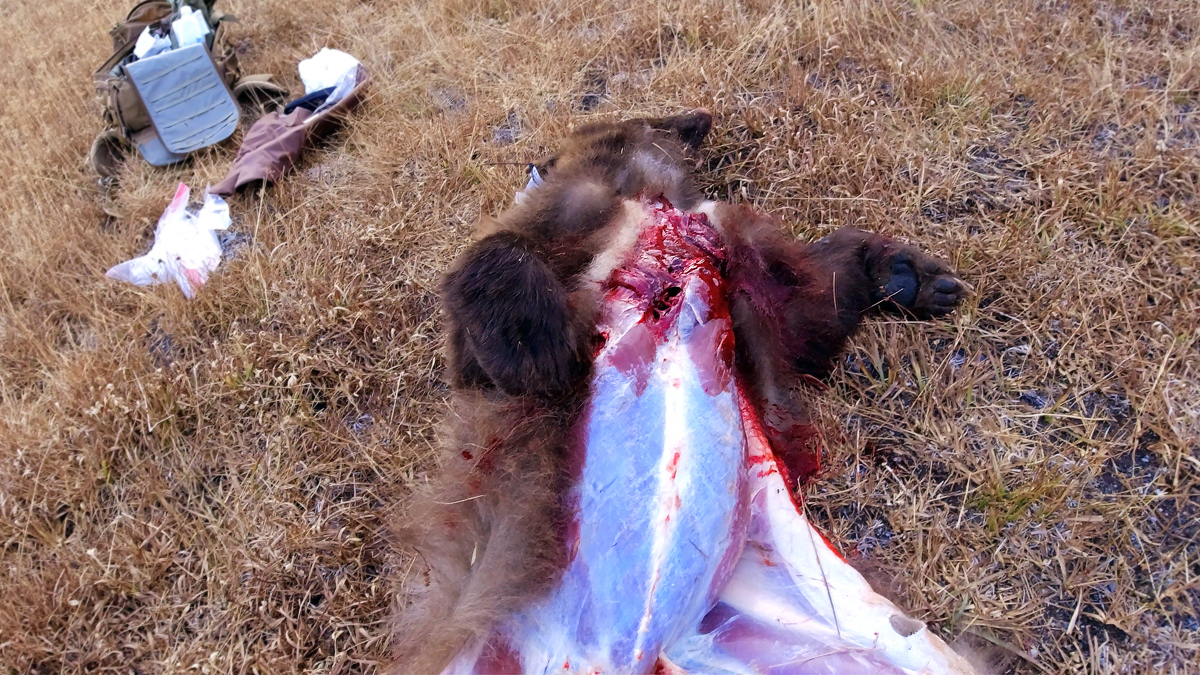
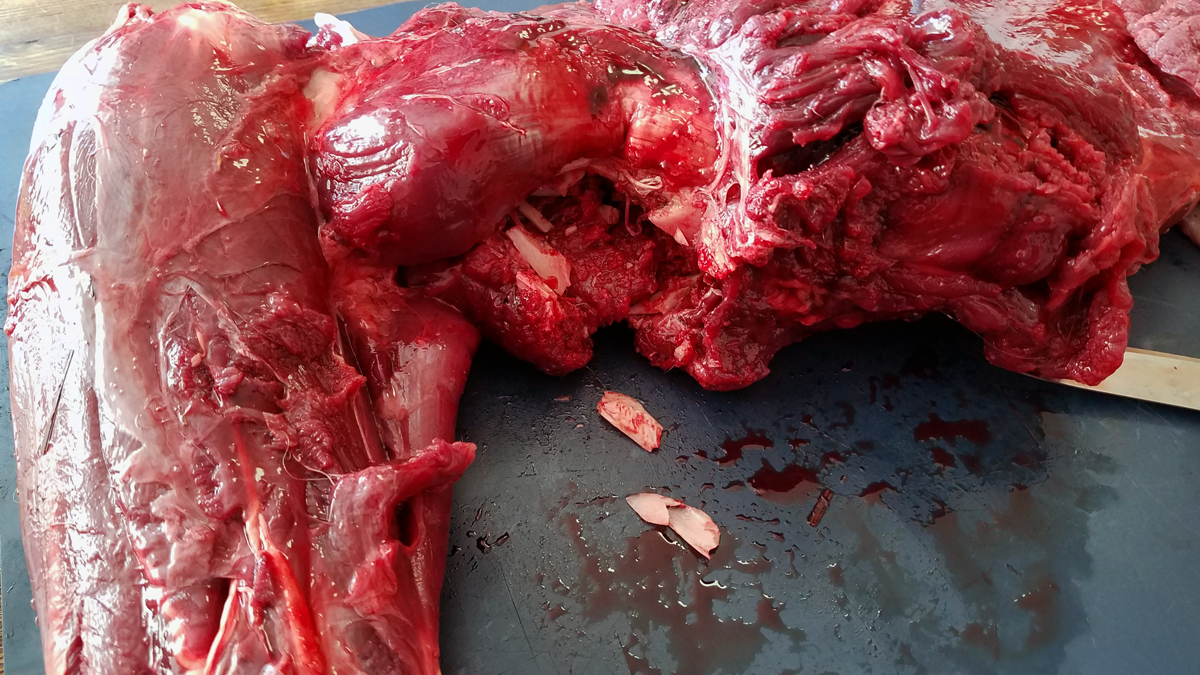
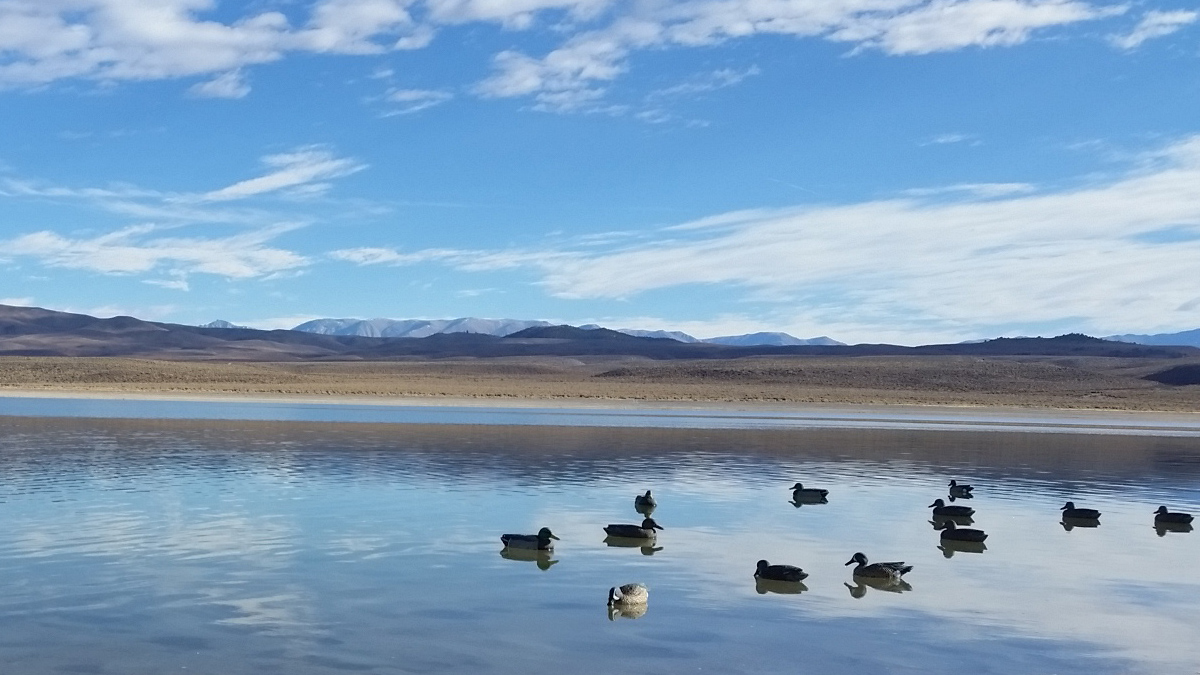
We used the Catalyst on a ton of scouting trips, and multiple outings for deer, dove, bear, grouse, and coyotes. The camo worked exceptionally well at many different elevations, on and below the slopes of the Eastern Sierra. We managed to get the Catalyst quite dirty, and even saturate portions of it with blood while field dressing game. Fortunately, dirt and blood were washed out of the fabric, with no special soap or effort, using the recommended washing and drying method.

We used the Catalyst on a cold morning bear hunt, and while active it was warm, but when sitting still in below-freezing temperatures, it was just a tad cold. That experience matched the suggested temperature ranges for the softshell to a tee. It seems like many manufacturers, especially when it comes to layers and sleeping bags, overstate their comfort ratings, so it was really refreshing that First Lite delivered exactly what they advertise. That type of honest rating makes it easier for a consumer to plan and prepare for trips with the appropriate layers, versus freezing one’s ass off and being severely irritated and disappointed.

Shooting at a Duck

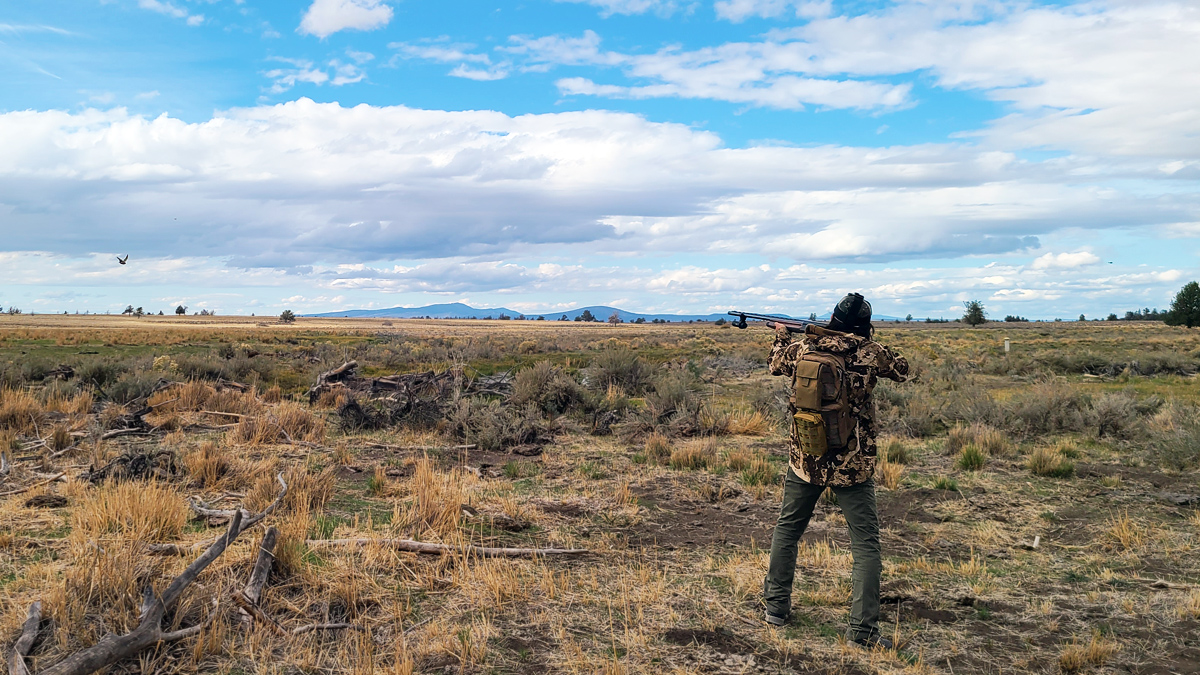
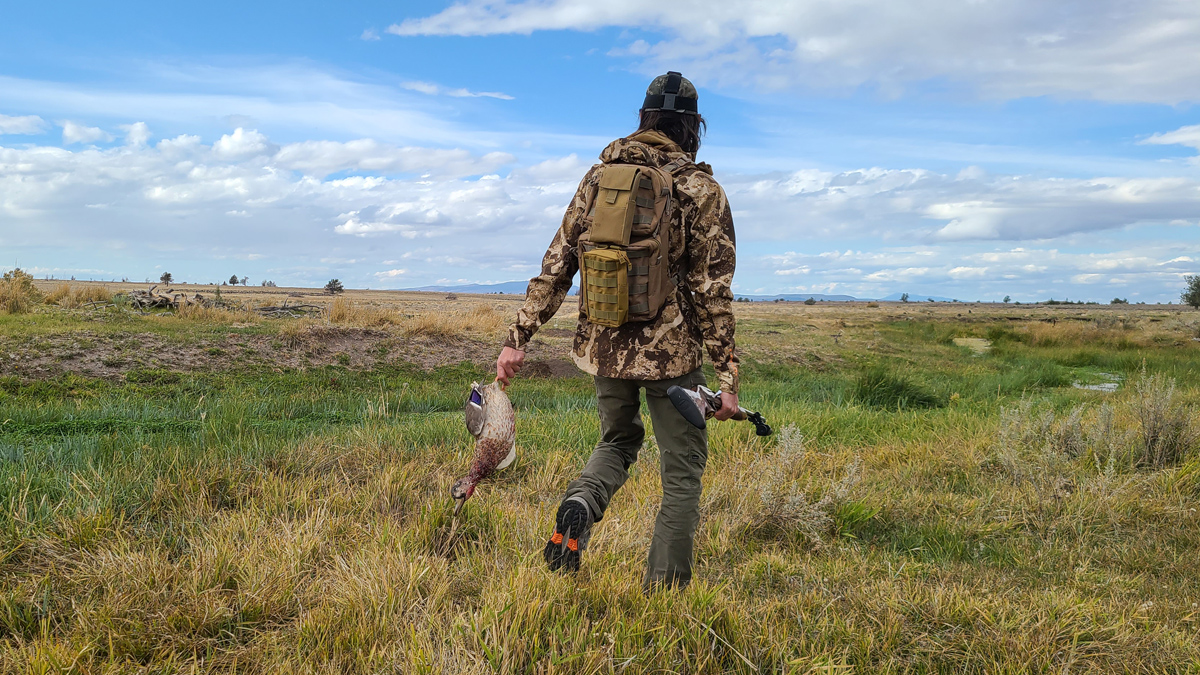
The author, wearing the Catalyst, shooting at a duck that flushed while jump shooting a marshy stream.

Conclusion

The Catalyst Soft Shell jacket is warm, for the marketed temperatures range and use, breathable, and quiet. Short of wanting a pocket liner and a tiny bit more torso length, the Catalyst doesn’t leave a whole lot more to ask for on its own. Of course, for extreme cold, you’ll still need to layer properly, which is a skill every hunter, angler, climber, and mountaineer should know anyway. First Lite does offer insulated outer layers, like puffies and rain jackets, if that is what you are looking for, but that isn’t why we purchased and reviewed the Catalyst.

What do you get with the First Lite Catalyst over lower-tier products? You get an improvement in materials, quality, comfort, and performance in a lightweight package that uses a really good camouflage pattern for western hunts. This is why we have no problem recommending the Catalyst jacket to somebody looking for a premium mid or outer-layer soft shell. We also really like the cipher camouflage pattern, and confirmed its effectiveness on a successful bear hunt this season.

Tags: , | Comments

Solo Bear Hunt

| October 14, 2021
Black Bear Harvested
Photo Credit: Keith Knoxsville
A Hen and a Drake Green Teal on the truck bed. Not a limit on anything, but a fun morning out.

I recently harvested a young black bear on a solo bear hunt on California public lands. With the archery season for deer completely disrupted by California’s forest closures, it was hard to keep up with scouting and tracking. When the forests re-opened, I was able to resume my efforts, and while I didn’t harvest the large bear I was looking for, I didn’t want to pass up an opportunity to put some bear meat in the freezer.

Scouting

I did quite a bit of scouting leading up to the deer and bear seasons. It required a lot of mileage and elevation gain on public lands to get away from people and to eliminate the possibility of harvesting a trash bear.

It’s an ironic thing to leave the house really early in the morning to go scout and hunt for bear, just to step outside the door and see very large black bears, habituated to human waste, dumpster diving. Anybody who has spent any time in any mountain or resort town in California has likely observed these types of bears. It’s sadly, probably the only experience folks have with bears, and the only time they see them outside of wildlife photos.

California bear hunting is a pure spot and stalk pursuit. California has no spring bear season, does not allow the use of dogs to hunt, does not allow baiting, does not allow trapping, and many scents, if not all scents, are not allowed. A large portion of California is also closed to bear hunting, making travel a necessity for those who pursue bears. While the population of bears has risen, it is not in an even distribution across the state, making the pursuit of bears in the areas with a lower density, as challenging as it’s ever been.

My scouting choices are always based on two things. The first being my previous experiences seeing good bear sign or observing good bear habitat while backpacking, fishing, or pursuing other game, and returning to those areas ahead of the season. The second involves satellite photography, and looking for good meadows, streams, creeks, etc. that are far enough off the beaten path to get away from campsites, people, and other hunter pressure.

Ultimately, while I did put thousands of feet of elevation gain and loss, and lots of miles scouting areas I had seen on satellite images, I returned to an area I had visited year after year, but usually later in the year. The sign earlier in the season seemed to indicate bears were active in the area, versus simply passing through like they seem to later in the season. I continued to scout and glass the same promising area, 3 miles into the backcountry and a 1000 feet of gain. I returned multiple mornings and afternoons, patterned the wind, the lighting, and ultimately bumped a large cinamon phase bear.

At that point, I was committed to an area that I was almost certain would produce a bear, and so I prepared. I was readied my Eberlestock G1 Little Brother, Eberlestock A4SS weapon scabbard, Walker's Rope Game Ears, CZ 557 Carbine chambered in 270, w/ Vortex Diamondback Tactical 6-24x50 FFP, DIY Nylon game bags, lots of cordage, a few 1 inch webbing straps, and a Havalon Knife.

Frost on the ground

Early morning frost on the ground, during one of many scouting trips.

Harvest day

I readied all of the aforementioned gear the night before the hunt. I also packed lightweight high-calorie snacks, a sawyer squeeze water filter, and a full water bottle. I woke up at 4am, drove about 30 miles including some slower forest service roads, and hoofed the 3 miles and thousand feet of gain fast enough, that I would be set up and ready with good visibility, when shooting light at 6:15 rolled around. I knew exactly what direction the wind would be blowing at that time, after countless morning trips, and set up in a spot that would keep me from getting winded by a bear.

While I was layered up for the cold, my core temp dropped over the next 40 minutes of sitting still, and I would occasionally shiver. I hate sitting still. At almost exactly 7:00 am, a small bear popped out of the tall willows, and weaved in and out of them. This was not the bear I had scouted, but with a road trip coming up in a few days, and imminent weather that would certainly change the behavior of bears on the way, I decided I would not pass up the opportunity to harvest.

I struggled to steady for a 160 yard shot, as I shivered from the cold in a seated position, and attempted to get a rest on my pack, all the while the bear moved further away, continuing to weave in and out of willows. Not being one to risk taking a bad shot, injuring or losing an animal, I took the opportunity to move behind some downed trees as the bear moved into a thick peninsula-shaped chunk of vegetation.

As I had expected, the bear came out of the brush, now about 190 yards away. I flipped the safety, steadied myself off of a downed tree, and pulled the trigger. There was no loud report, just the sound of the firing pin. I had loaded my rifle earlier as soon as I got out of the car, and managed to load with the bolt just shy of fully extended, so when I closed the bolt, I had in fact never chambered one, and slid the bolt closed right over the top of my freshly loaded ammunition.

Wind in my favor, the bear had not heard me make my rookie mistake, and still had no idea I was nearby. I stayed calm and chambered a round as the bear began to quarter away and head into thick brush. I knew it was now or never, as I probably would not be able to find the bear again if it entered the vegetation ahead of it. I steadied, and as the bear began to enter the vegetation quartered away at 200 yards, I took a shot. I watched through my scope as the 140 grain bullet, moving more than 3000 fps, hit the bear like Thor’s hammer, and continued watching through the scope as the bear flipped straight onto its back, legs straight into the air, before it wasn’t visible in the tall grass and brush anymore.

I immediately chambered another round and cautiously approached where I had shot the bear 200 yards away. I was pretty sure that I not only hit the bear, but that it was probably a good shot and quick death. Nevertheless, I approached with caution ready to shoot again. I’ve been charged by a bear once before in my life before, and it’s not an experience I was eager to repeat, especially with a wounded bear.

As I got near the edge of the thick brush, I saw that the bear had immediately been dispatched, and didn’t even take a step after being shot. I was pleased that I was able to dispatch the bear so quickly and humanely, grateful I did not have to pursue a wounded or injured bear, and to my own greater satisfaction the shot hit both the heart and lungs. Aside from the one rookie dry firing exercise on an unchambered rifle, and finding a smaller bear than the one I had hoped to see again, the whole morning could not have gone better. While I had already put in a ton of work, the real work was just about to begin.

Field Dressing a Black Bear

The author field dressing a black bear, and preparing for the pack out on a successful solo hunt.

Packing Out

I dragged the bear about 10 feet, about as much as I could do alone so that it would be easier to field dress. The field dressing work went smoothly. I decided to push myself, and my Eberlestock G1 pack to the limit, and do the pack out solo in a single effort. If the bear had been an ounce heavier, I’d have opted to do multiple trips. I strapped large nylon game bags externally to the pack after filling the inside of the pack completely.

The pack was heavy, and less than ergonomic loaded the way it was. I ended up packing more than my body weight about 3 miles, and down a 1000 foot descent. While the pack held up fine, there is definitely an external frame I’ll be purchasing from Eberlestock, and adding to my hunting setup in the future. The descent was rough on my back, shoulders, and especially my knees, but I managed to reach the car, and did it in a decent time. It only took a few minutes to feel how beat up my body was from the solo pack out, but the real pain would come a day later.

CDFW Inspection

In California when you harvest a bear, you are required to get the harvest checked off, and a tooth extracted for aging and research. However, because of COVID, all local offices were closed, with no helpful information on message recordings whatsoever. Fortunately, I had the local game warden supervisor’s business card on hand and managed to schedule a house call with another game warden.

The visit was brief, involving a simple check of tags, validation of a properly field-dressed animal, a tooth extraction, and a little chit chat. I completed a simple harvest report online, and 2021’s bear season was over.

Reflections

My wife and I spent the next 2 days breaking down major muscle groups into steaks, roasts, stew meat, and grinder meat, and I also managed to flesh and salt the hide. While I didn’t regret the hard pack out, my body hated me for it. Everything hurt for the next two days.

The most difficult part of the hunt physically may have been packing out the bear, but the hardest part was the leg work and commitment that went into scouting, glassing, finding a good spot, finding bears, and then being in the right spot at the right time. My bear could have been twice as big, and when I load my rifle on an early morning in the dark, I’ll be sure to load with my bolt completely back as to actually chamber a round, but I really couldn’t have hoped for a better outcome on a public lands bear hunt in the Eastern Sierra.

Butchering

I won’t get heavy into the butchering. My wife and I spent a couple of days processing meat. Honestly, she did the majority of it while I worked on fleshing and tanning a hide, in addition to a euro mount. For the DIY butcher, you really need a grinder and a vacuum sealer. We use a KitchenAid meat grinder attachment and a basic Food Saver vacuum sealer. With those two items and sharp knives, we’ve done quite a few antelope, deer, elk, hogs, and bear. You could always get a dedicated meat grinder, but it’s nice to get extra use out of a stand mixer. Our stand mixer gets used for baking, and pasta making all the time.

Heart Shot

A damaged heart, split in half by a well placed shot from a 140gr 270 win.

Black Bear Exit Wound

Shattered bones from an exit wound, caused by a bullet traveling through an arm after passing through the torso.

Grinding Bear Meat

Grinding black bear meat, with a Kitchen Aid meat grinder attachment.

Tags: , , | Comments

Gear Up For Waterfowl

| October 11, 2021
Successful Jump Shooting
Photo Credit: Keith Knoxsville
A Hen and a Drake Green Teal on the truck bed. Not a limit on anything, but a fun morning out.

The California waterfowl season already started in the northeastern zone, and is only a couple of weeks away for the majority of the state. It’s not too late to get ready and enjoy the season as soon as it starts, but you’ll need to make sure you have a few items. We break down what you’ll need.

Shotgun

The essential item for waterfowl hunting is a shotgun. For most, a good and ultra-reliable 12 gauge shotgun, like the Beretta A300 or Benelli Montefeltro, two of our favorite workhorses, are the way to go. While many suggest a pump shotgun as a foray into hunting with a shotgun, we’ve never had somebody regret our recommendation of a high-quality semi-automatic shotgun, and in our opinion, there is no difference in safety and handling as every firearm should be treated like a loaded and dangerous weapon.

Ammunition

If you don’t load your own high-speed steel, bismuth, or tungsten shotshells, then the options really boil down to just a couple of good ones. Hevi-Metal by Hevi shot, which is a blend of lead-free alloy and steel shot is probably the most common, but pairs the heavier alloy with steel to make it more economical. Bismuth and Tungsten options from Kent, as well as their Fasteel 2.0 are also good options. Less common, and somewhat premium, are Boss Shotshells, boasting high speeds and heavy alloys. Regardless of the brand you choose to go with, or is simply available near you, dense, lead-free ammunition with fast velocities that pattern well in your shotgun are the way to go.

Camouflage

It’s possible to jump shoot birds with a shotgun and nothing else. Your camouflage choice can be a green or brown t-shirt to help match your environment, and you’ll probably be able to creep up on ducks and get a shot off once in a while. However, for greater success, especially if you will be hunting over decoys, you really need to get some decent camouflage. You’ll want a camo hat or balaclava if it is cold, and a shirt or jacket depending on the temperature where you hunt. Pants are sort of optional, most khaki brown or green pants will suffice, and if you wear camo chest waders, then pants don’t matter at all.

Ducks have great vision, so the better your camouflage, and the ability of the pattern to match your environment, the better your hunting will be. We really like and frequently use the First Lite Catalyst, for many of our hunts, whether it’s for waterfowl or big game. While it’s not the cheapest option out there, it is a great one. It’s what is being worn in the photos taken while jump shooting.

Shooting at a Duck

The author shooting at a duck that flushed while jump shooting a marshy stream.

Decoys

If you only plan to jump shoot, then decoys aren’t necessary. However, it won’t be long before you wish you had more shooting opportunities that a dozen or more decoys can provide. A good start, and decoys we use and recommend are the rugged series decoys from Hard Core Decoys. We especially like the Green Teal and either Gadwall or Mallard decoys, which are ideal to start with, as they are very common species just about everywhere.

Waders

You may be able to get away without waders for jump shooting, but you’ll eventually want some after you get wet a few too many times crossing rivers and streams, or post-holing in muddy banks. Hip waders are okay, but we prefer and recommend chest waders. Waders don’t have to break the bank either, you can get a decent pair of waders, like the TIDEWE Chest Waders with Realtree MAX5 Camo and 800G insulation, for less than 150 dollars.

Duck Calls

There are many waterfowl hunting days where we’ve never even pulled duck calls out of our packs. In some environments, they may not be necessary. In others, it may be the only way to draw attention to your decoy spread. Some calls are better than others, but in general the results seem a little more binary. They either get a ducks attention or they don’t, or maybe we just suck at calling. When we do call and have success, our go to is the Primos Pro Mallard Call. Are there better one’s out there? Probably, but for our calling skills, this one works just as fine.

Choke

Regardless of the velocity, as your shot string travels, the pattern opens up. At longer distances it can introduce some large holes in the pattern, that may allow birds to escape. If you are going to shoot anything other than birds flaring over decoys, an extended choke with a tighter constriction will be a game-changer. Our favorite chokes are manufactured by Carlson's Chokes, especially their extended ported chokes with “No Size or Speed Restrictions with Steel Shot”. Be sure to check the thread size and style on your shotgun, to be sure you get the correct choke, they are not all universal.

Decoys on Still Water

Duck decoys on almost glassy water, and great views on a gorgeous morning.

Decoy Retriever

A decoy retriever is a helpful tool to have if you hunt in slightly deeper water, and aren’t interested in filling your waders. A decoy retriever makes decoy and duck retrieval easier, especially if you hunt without a dog or kayak. Put plainly, its a long stick, usually collapsable, with a hook on the end and can both keep you drier, and make your life easier.

Blind

You can use natural camouflage like tall brush or reeds, but some environments require a blind. While you could get away with a sheet of camouflage burlap, a layout blind is much more comfortable and provides better opportunities to add natural vegetation to your camouflage than a burlap sheet does. We use and recommend the Bulk Decoy Club Layout Blind because of its ultralight weight, cheap price, portability, and dual-use as a decoy bag.

Let ’em have it!

The longest reaching choke, 3 ½ inch TSS shells, premium brand camo, and all the decoys in the world won’t guarantee that you’ll limit on ducks every time you go out into the field. You will still need to learn about duck behaviors, patterns, how to deploy successful decoy spreads, stealthiness, calling, leading your target, and good shooting, to be a successful waterfowler.

With that said, a willingness to put in the time and learn how to be a better hunter, good waterfowl gear will make a difference. So get geared up, get out there, learn when you can, always try to improve, and harvest some birds!

| Comments