6 Best Survival Rifles Under $500
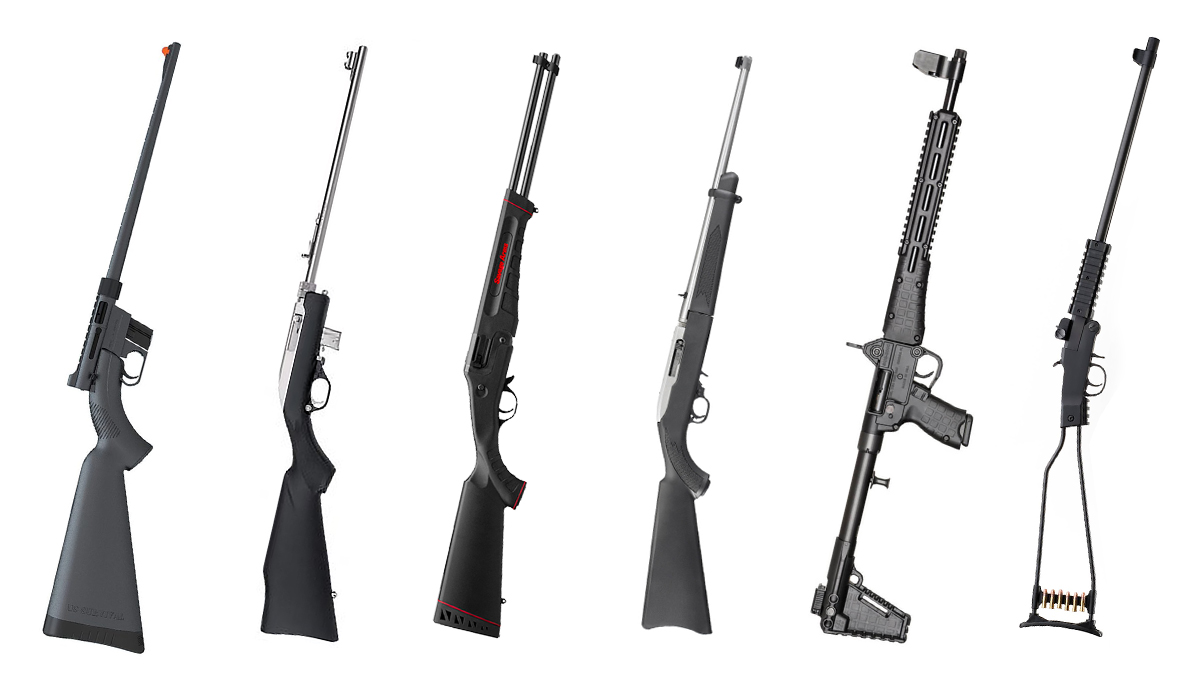
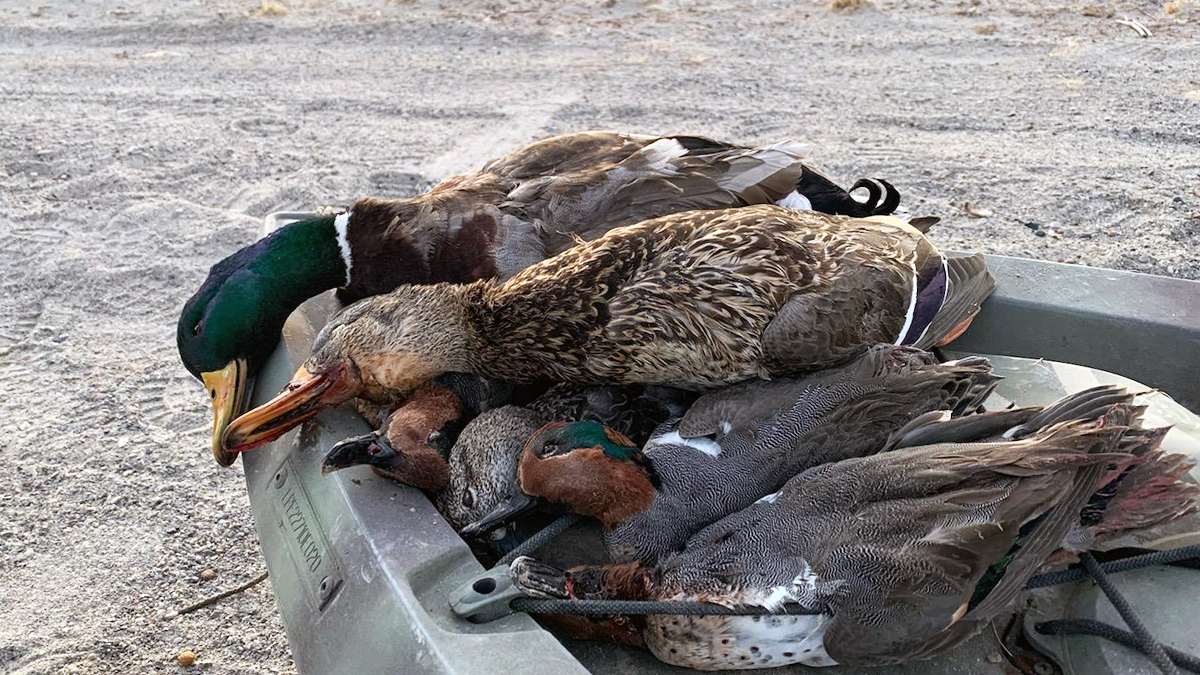
Photo Credit: Keith Knoxsville
A Hen and a Drake Green Teal on the truck bed. Not a limit on anything, but a fun morning out.
Survival rifles were originally designed to give downed aircrew a survival weapon for harvesting game. Original notable designs date back to the M4 Survival rifle, developed shortly after WWII, chambered in .22 hornet. For the modern sportsman, survival rifles are less about surviving unplanned punchouts over remote wilderness and more about having a lightweight firearm that can fold down and fit in a pack or kayak dry bag, is reliable, and accurate.
Survival rifles are a perfect choice for backcountry travel where hunting isn’t necessarily the main focus, but where you might encounter a diverse range of small game species and want the option to harvest them. We’ve chosen 6 versatile options, available for under $500, to help you choose the best survival rifle for you!
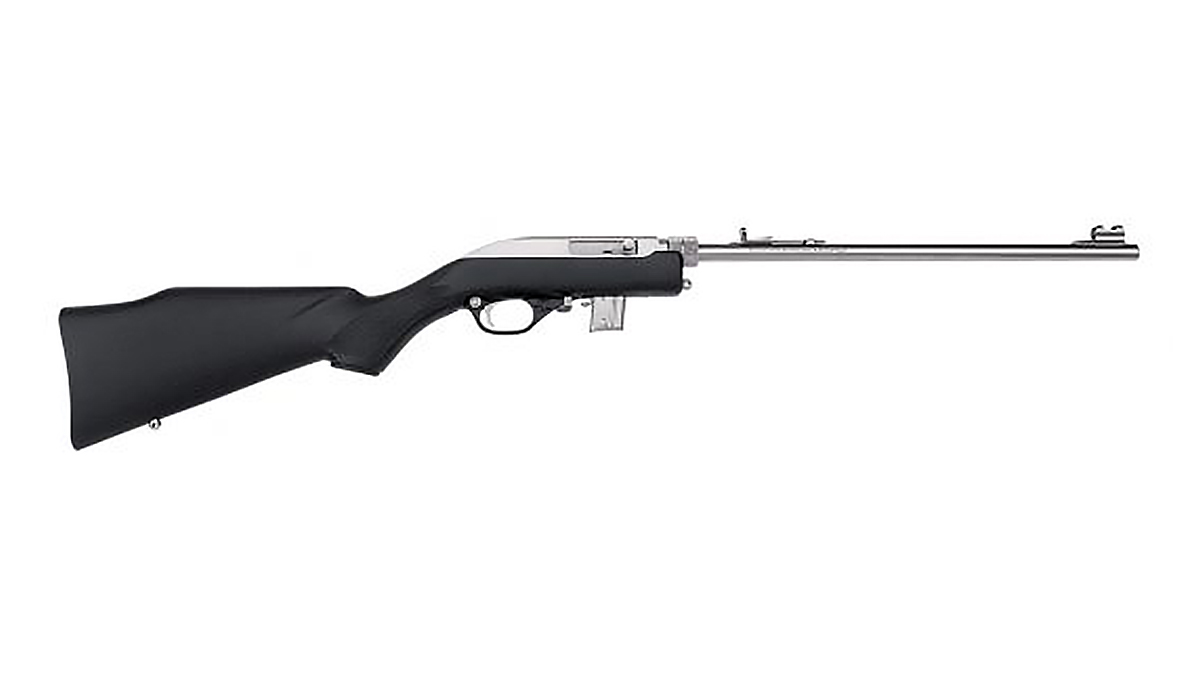
Henry AR 7
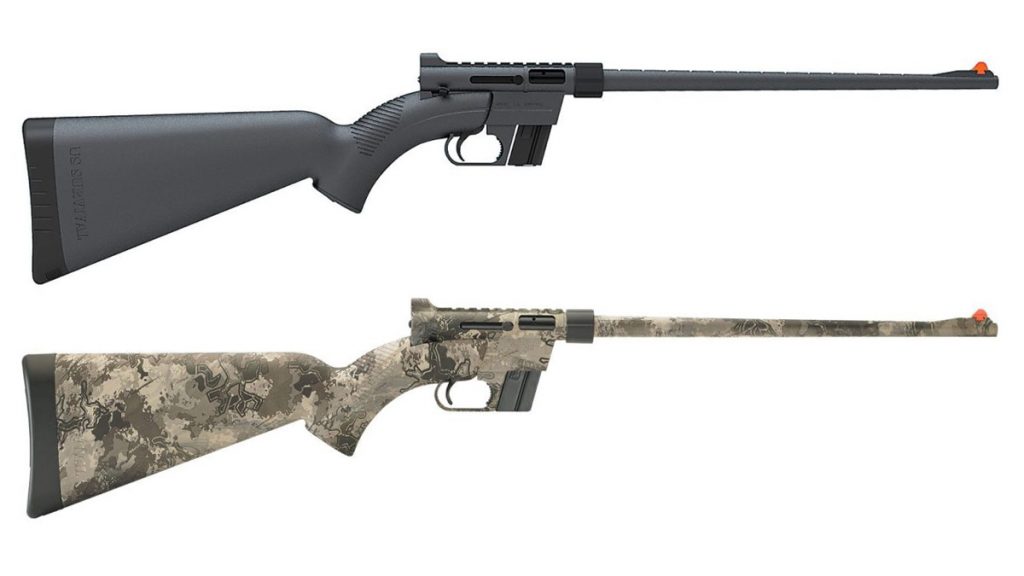
Henry AR7 Survival Rifle
Full length | 35 inches
Pack length | 16.5 inches
Weight | 3.5 pounds
Caliber | .22 LR
Capacity | 8+1
Magazine Type | Detachable
Sights | Adjustable Rear, Blade Front
Price | $269
See It At Cabelas
See It At Bass Pro Shops
The Henry AR 7 is an extremely portable, highly reliable, semi-automatic 22lr rifle, designed for and used by Air Force pilots since 1959.
It’s the first rifle that comes to mind when survival rifles are the topic of conversation. It packs into its own stock, floats, and is treated with a Teflon coating for durability in all weather conditions.
One of the better AR 7 features is that the dovetail rail on the receiver is cut with Picatinny slots, so it’ll accept both Picatinny and Weaver style optic mounts/optics.
It’s affordable, accurate, and lightweight. It’s hard to be critical of the Henry AR 7, but if one had to nitpick, it isn’t highly customizable. Unlike a Ruger 10/22 Takedown, which offers the potential for unlimited amounts of upgrades, including exceptionally crisp aftermarket triggers, the Henry AR 7 hardly has any aftermarket options.
See It At Cabelas
See It At Bass Pro Shops
Marlin 70PSS Takedown

Marlin Model 70PSS Takedown Survival Rifle
Full length | 36 inches
Pack length | 21 inches
Weight | 3.25 pounds
Caliber | .22 LR
Capacity | 7+1
Magazine Type | Detachable
Sights | Ramp Front &
Adjustable Rear |
Price | $249
See it at Sportsman's Warehouse
The Marlin 70PSS Takedown is an accurate, blowback operated rifle, chambered in .22lr, and has a full length 16.25” barrel with the micro-groove rifling that Marlin rimfires are known for.
While the 70PSS isn’t the cheapest survival rifle on our list, it is the cheapest semi-automatic on the list. It also sports a durable stainless steel finish and can be field stripped with a hex key set.
The 70 PSS has some aftermarket parts available but certainly doesn’t lend itself to customization like the Ruger 10/22. There is a trigger kit that drops 2 pounds on the factory trigger, but that seems like one of the very few upgrades available for the 70PSS.
Given the other options, like the truly bare bones Henry AR 7, or the highly customizable Ruger 10/22, the Marlin 70PSS Takedown falls somewhere in the middle. Depending on your needs and desire for customizability the Marlin might just hit the sweet spot.
See it at Sportsman's Warehouse
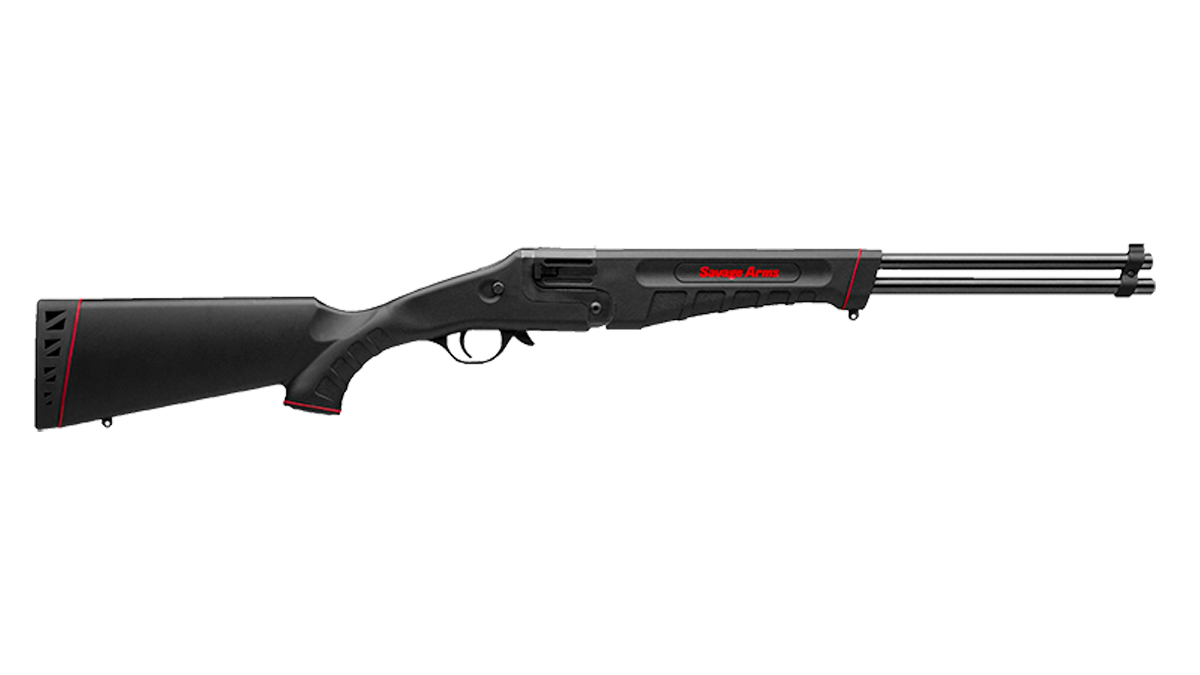
Savage Model 42 Takedown
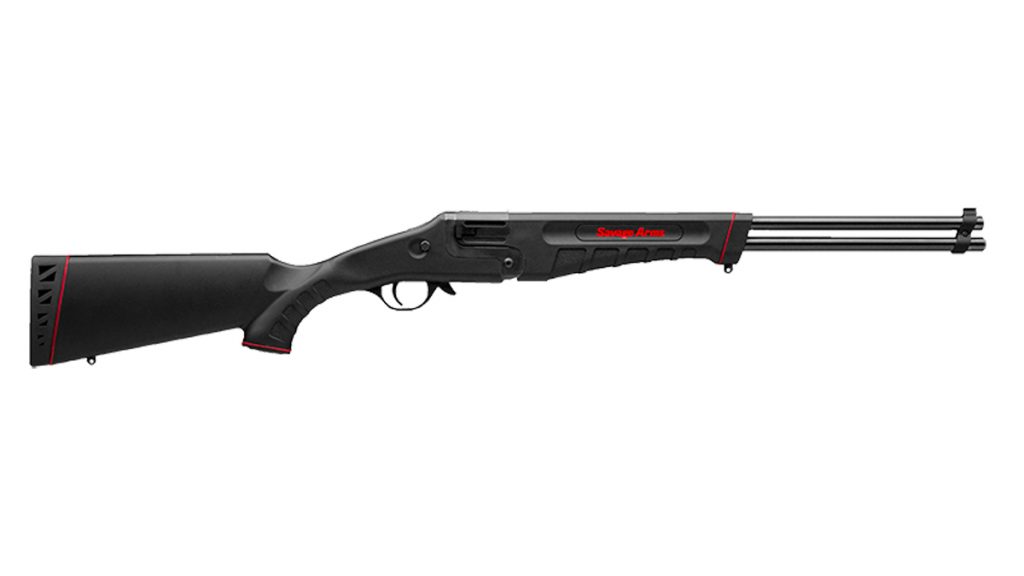
Savage Model 42 Takedown Survival Rifle
Full length | 34.75 inches
Pack length | 20 inches
Weight | 4.65 pounds
Caliber | .22 LR (top barrel), .410 (bottom barrel)
Capacity | 2
Magazine Type | Single-Shot, Break Action
Sights | Open Adjustable
Price | $429
See it at Sportsman's Warehouse
At first glance, the Savage Model 42 Takedown, a single-shot rifle, priced at $429 doesn’t necessarily seem like a great value. While this is about twice the price of the single-shot Chiappa Little Badger, you must consider that the Model 42 comes with an additional barrel, offering a much wider range of game harvesting opportunities.
The Model 42 is an over-under style firearm. The top barrel is chambered in your choice of either a .22 LR or .22 Magnum, and the bottom is a .410 gauge shotgun barrel. The two barrels give you a lot of options. Whether you’re taking small game with the .22lr, dispatching predators with a .410 slug or buckshot, or harvesting ptarmigan and grouse with .410 birdshot, there are few situations where you will find yourself lacking the right tool. Yes it’s a little bit weighty, but given the versatility, it provides, the Model 42 is an exceptional option for a backcountry survival rifle.
See it at Sportsman's Warehouse
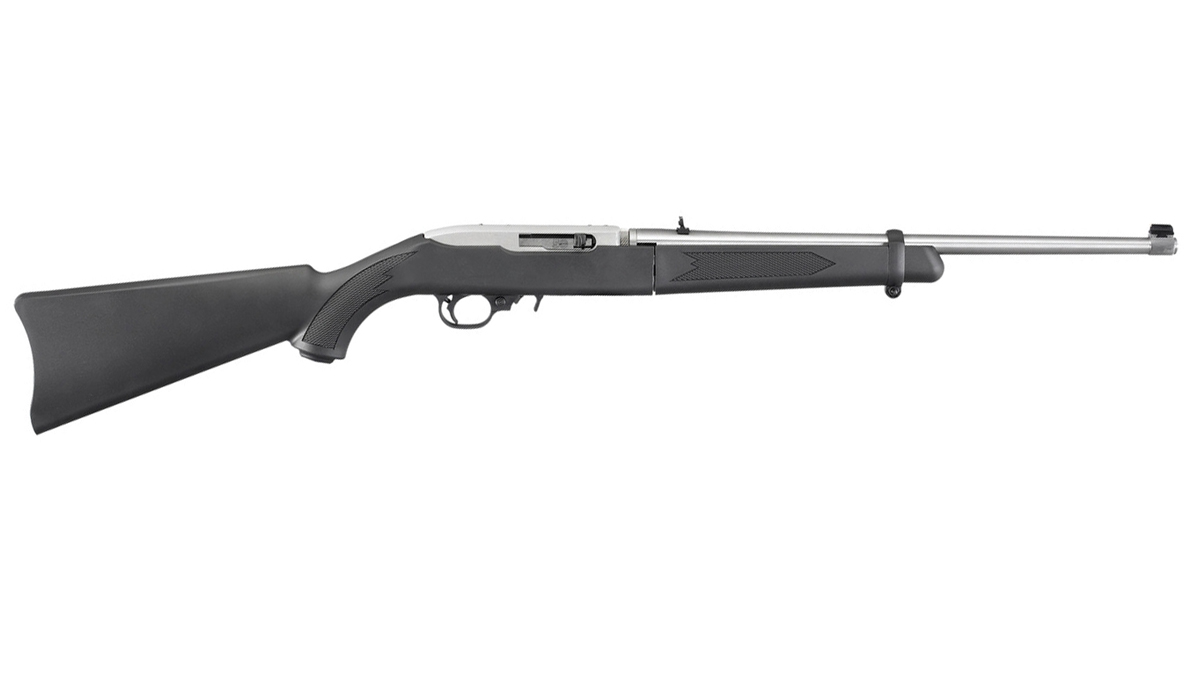
Ruger 10/22 Takedown
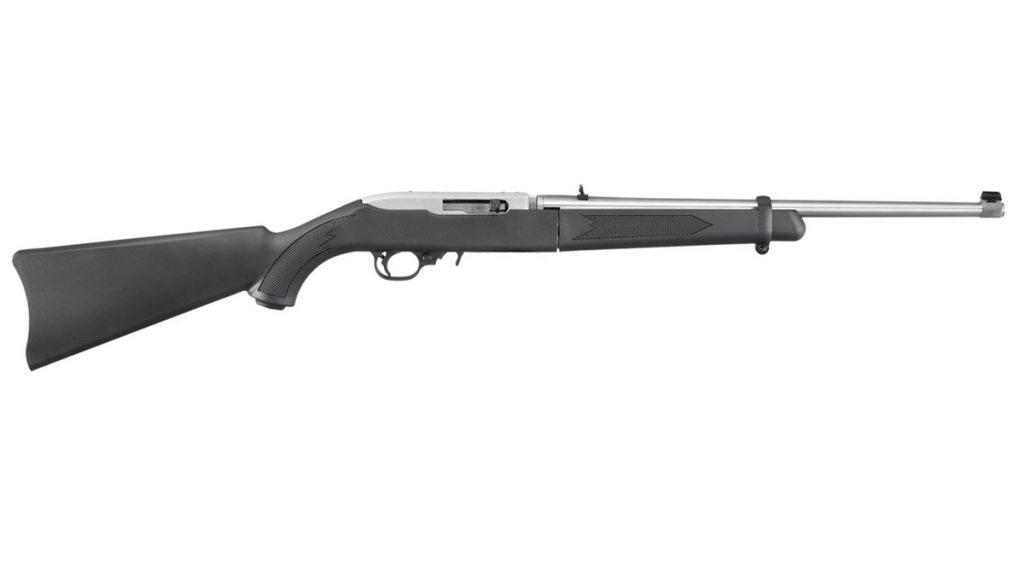
Ruger 10 22 Takedown Survival Rifle
Full length | 37 inches
Pack length | 20.25 inches
Weight | 4.67 pounds
Caliber | .22 LR
Capacity | 10 + 1
Magazine Type | Detachable
Sights | Fixed
Price | $379
See it at Bass Pro Shops
See it at Cabelas
In the category of lightweight backpacking or wilderness survival rifles chambered in .22lr, the Ruger 10/22 Takedown is a little bit of a heifer. Being very similar to the standard 10/22 model, it does accept standard 10/22 magazines and many other drop-in upgrades.
Some folks have criticized the 10/22 for being inaccurate. That hasn’t been my experience. In fact, I use a standard model 10/22 that I’ve accurized for all my small game hunting. I bedded the action, re-crowned the barrel, added a , and the result was an incredibly accurate firearm. That being said, the stock versions shoot very well and the accurizing was done primarily out of my interest in tinkering. It isn’t picky when it comes to ammo and shoots non-match ammo without any issues.
The 10/22 takedown is accurate enough for hunting small game, and while it is a little heavier than other models in our roundup, it’s incredibly reliable, easily serviceable, and many aftermarket products exist to personalize the 10/22 to meet your needs.
See it at Bass Pro Shops
See it at Cabelas
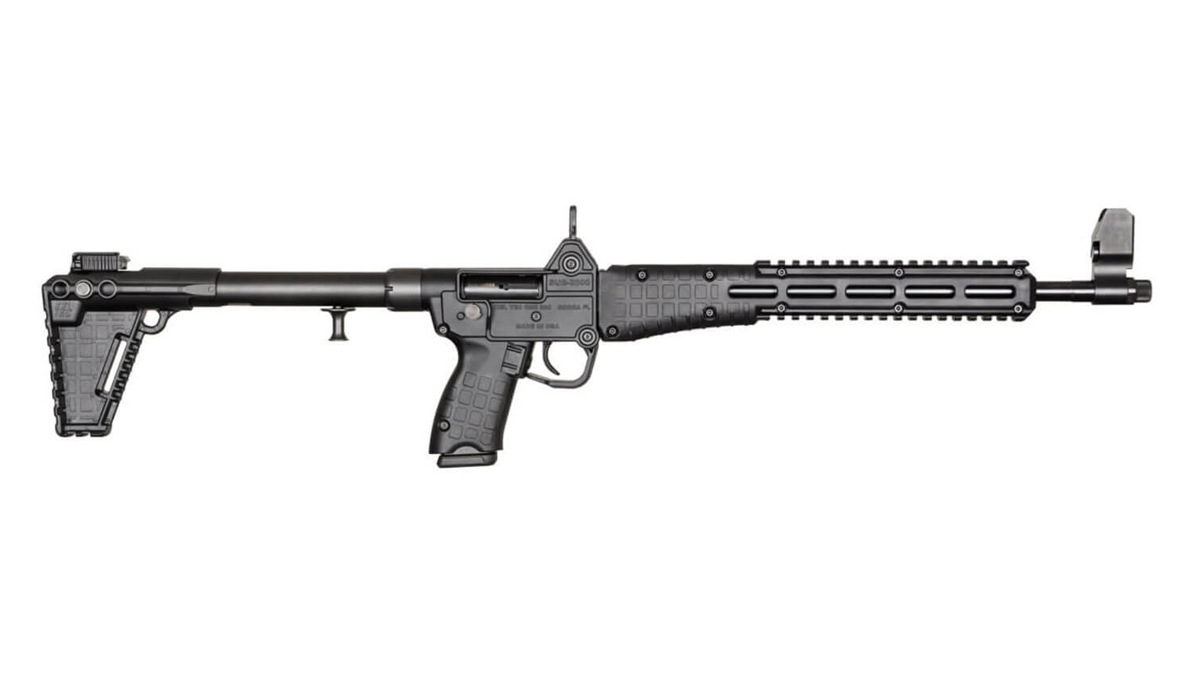
Kel-Tec SUB2000
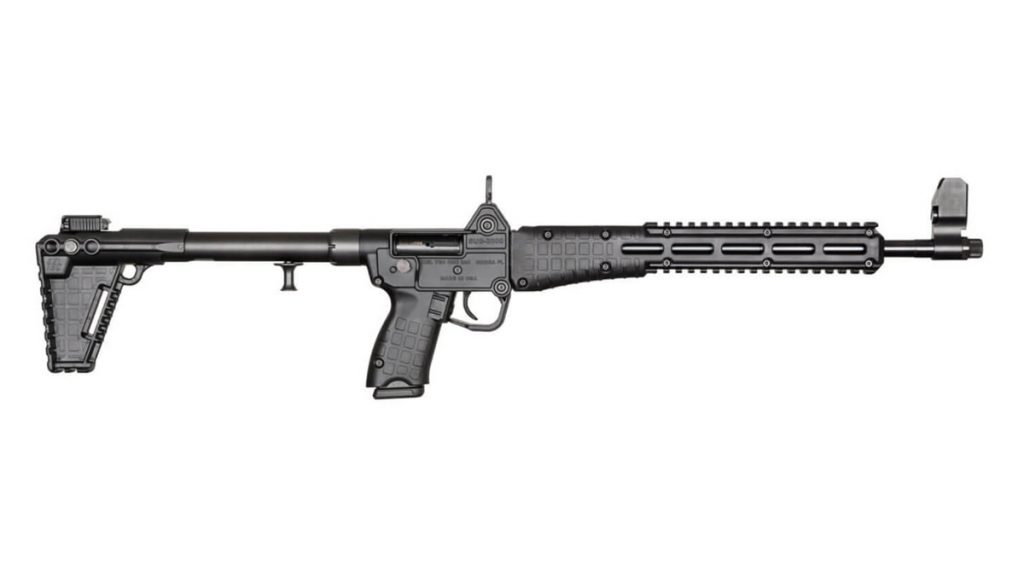
Kel-Tec Sub2000 Survival Rifle
Full length | 30.5 inches
Pack length | 16.25 inches
Weight | 4.25 pounds
Calibers | 9mm or .40 S&W
Capacity | 15+1 (.40 S&W)
Magazine Type | Detachable
Sights | Fixed
Price | $449
See it at Sportsman's Warehouse
Kel-Tec, known for its innovative firearm designs, designed the Kel-Tec SUB2000 as a very versatile, full sized, pistol caliber carbine. It has a full length 16” barrel, is compatible with Glock and other magazines, and is offered in either 9mm or .40 S&W.
It also features a forend with Picatinny rails, allowing it to accept all kinds of tactical accessories. While it folds down to a minuscule 16.25” inches and will fit into a small pack, it still weighs 4.25 pounds, unloaded, and without tactical accessories.
I can’t say I’m exactly enthusiastic about the aesthetics of the Kel-Tec SUB2000, but given its innovative features, perhaps I could turn a blind eye to it.
Where I have a more legitimate criticism is in its practicality in the backcountry. While it may kill a coyote, neither the 9mm nor .40 S&W are ideal calibers for ethically harvesting a deer, and are even less practical for rabbit hunting.
Also worth recognizing, is the increased size and weight of pistol-caliber ammunition, compared to 22lr ammunition. Weight and storage space for pistol caliber ammo doesn’t excite me when compared to the hundreds or thousands of rounds of 22lr I could carry into the backcountry instead.
See it at Sportsman's Warehouse
Chiappa Little Badger

Chiappa Little Badger Survival Rifle
Full length | 32 inches
Pack length | 16.5 inches
Weight | 2.9 pounds
Calibers | .22 LR, .17 HMR, or .22 Magnum
Capacity | 1
Magazine Type | None, Break Action
Sights | Fixed
Price | $179
See it at Sportsman's Warehouse
Unlike the plastic Nerf gun look of the Kel-Tec, the Chiappa Little Badger is crude and in a way elegant. The Italian made single-shot has a break-open action and a full length 16.5” barrel. It has a reputation for being one of the more accurate backcountry survival rifles, in any of its 3 offered calibers.
The Chiappa Little Badger weighing in at just under 3lbs is lightweight. This is a simple, no-frills firearm. The Little Badger has no commercial aftermarket accessories available for it. Lots of folks, however, do some DIY customization, including attaching things to the wire stock or wrapping them in 550 paracord.
While you don’t plan on missing your small survival quarry, if you did, the Little Badger isn’t going to help you with a fast follow up shot the way a semi-automatic will. With fewer moving parts and no magazine to speak of, the Little Badger shaves both weight and cost. Thankfully, it doesn’t shave down the receiver completely. Instead, it boasts a 4 sided Picatinny rail, allowing for the mounting of optics, lights, or any other accessories.
At $179 it’s a great value, and could serve as a backup survival rifle, if it doesn’t serve as your primary one. It could also be an easy way to add a caliber, like .17hmr for harvesting coyote furs, while primarily using your .22lr for your small game hunts.
See it at Sportsman's Warehouse
Let Us Know!
If there is a survival rifle that you think we forgot, and belongs on this list, let us know in the comments.
Tags: backcountry rifle, best survival rifle, survival rifle, survival rifles, takedown rifle
|